
At work, I occasionally find myself in a situation where I have to have a serious talk with my team about a job that could have been done better. Such conversations are hardly my favorite part of the day, so I sometimes wonder what my colleagues say once I turn my back.
After some of our arguments, I can picture them saying that I arrived at work that morning on a broom instead of the subway out of Brooklyn. I do not want to be that kind of boss, but sometimes the result simply requires more work.
With kitchen cleaning, the biggest difference comes down to how you deal with dirt when it is still fresh. Wipe up spilled food early, remove grease around the stove before it forms a sticky layer, and give built-up grime a separate treatment suited to the surface. Just yesterday, I ended up in one of those arguments.
Part of my team had responsibility for an apartment with a kitchen, and unfortunately for them, and fortunately for me, that was the exact apartment I chose to inspect.
At first glance, the kitchen looked tidy. Then I looked at the tops of the cabinets next to the stove and saw a greasy layer mixed with dust.
Someone had clearly cleaned there, but the built-up grime remained. You are probably better off without the details of the argument that followed.
Why Did I Decide to Write This Guide?

When I got home later, I thought I might have gone a little too far. That was exactly what inspired me to create a guide for those of you who read my blog at home.
I want to share what experience has taught me about kitchen cleaning, from daily spills to stubborn grease that has sat on cabinets for far too long.
I want to show you how to organize the work better, which products to choose, and what equipment I actually use once an ordinary damp cloth can no longer handle the job.
What I Want You to Remember Before You Start Kitchen Cleaning
A good kitchen cleaning system starts with an assessment of what is right in front of you. At home, I always keep several good microfiber cloths and a small nylon-bristle brush.
I would add a quality dish soap and a product recommended by the manufacturer for your specific surfaces. With stronger chemicals, I read the label every time.
The CDC recommends that you clean a surface before sanitizing or disinfecting it, with a product suitable for the material and according to the directions on the label. For most regular household maintenance, soap or detergent and water remove most dirt and germs. I want you to remember one point in particular.
Do not mix chemical cleaners. At work, I expect employees to know what is inside the bottle in their hand, and I would recommend the same rule at home.
Start Daily Kitchen Cleaning Where You Cook
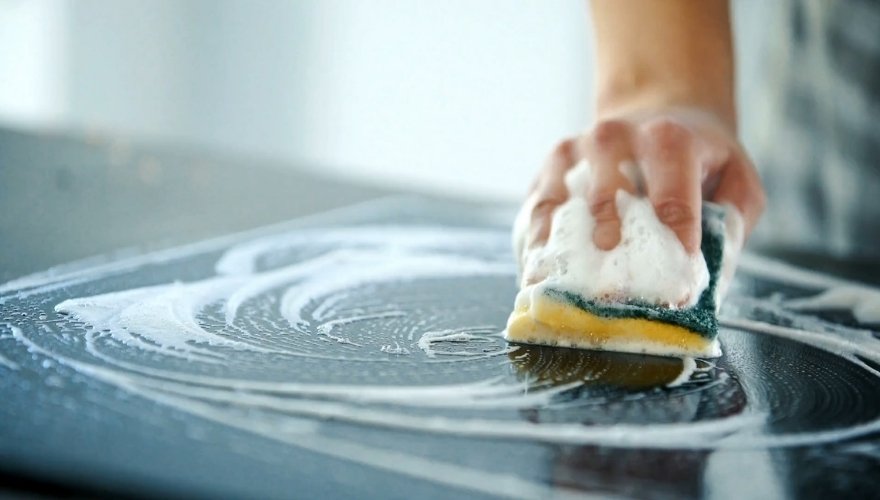
My eyes always go to the stove first. Why do I insist so much on daily maintenance? Because I have seen far too many times what happens when a thin layer of grease sits for weeks.
Dust sticks to it, fresh grease lands on top of the old layer, and eventually you have a sticky surface that a single pass with a cloth can no longer fix. Your daily kitchen cleaning can therefore stay short.
After you cook, I would wipe up whatever has just appeared and save the more detailed jobs for a day when I have enough time to do them properly.
If you prefer a set routine, my weekly cleaning schedule shows how I spread different jobs across the week without one marathon cleaning day.
A Few of My Tricks That Can Make the Job Easier
Degrease the Area Around the Stove With Warm Water, Dish Soap, and a Microfiber Cloth
For fresh grease, I would first take a bowl of warm water and add a small amount of hand dish soap. Wet a microfiber cloth, wring it out well, and wipe the greasy area once the surface has fully cooled.
Dish soap is my first choice because it is made to break down grease. For daily kitchen cleaning, I often need nothing stronger. Wet the area with a solution that is safe for the surface and leave it in place for the amount of time stated in the product directions.
Then try the microfiber cloth again. For narrow joints, I use a small nylon brush. A toothbrush reserved only for cleaning can also help.
For a glass-ceramic or induction cooktop, use a product and scraper approved by the manufacturer. Steel wool would never be my first choice here.
For stubborn grease on backsplash tiles, you can move on to a commercial kitchen degreaser whose label states that it is safe for the material.
Wear gloves if the manufacturer requires them and follow the stated contact time. After I finish, I sometimes open a window.
I have already written about why I open my windows every day, so I will leave that subject there.
Wash the Countertop With a Mild Cleaner and Pay Special Attention to the Area Used for Raw Food
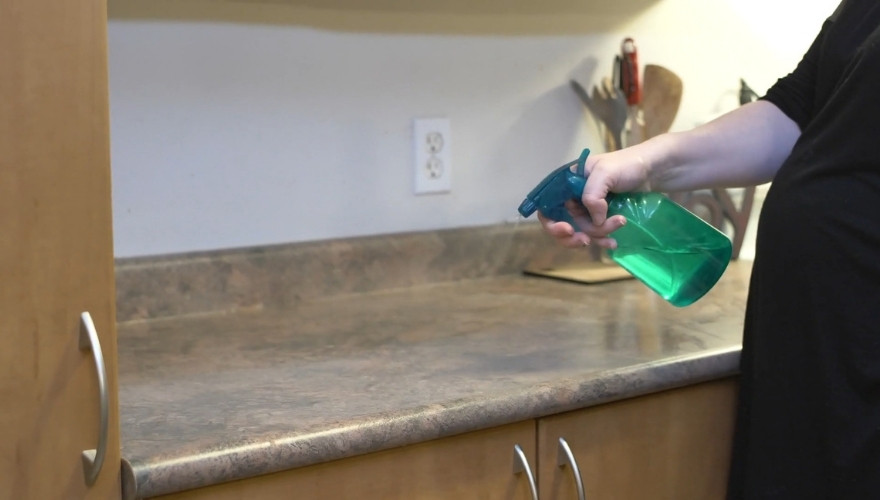
First remove crumbs and food scraps from the countertop. Then apply a mild mix of detergent and water to a cloth and wipe the whole area. Use a clean damp cloth to remove any product residue if the surface requires it, then dry it.
The Natural Stone Institute recommends a neutral cleaner for natural stone or a small amount of mild detergent with warm water. Vinegar, lemon, and other acidic products can damage marble, limestone, or travertine.
See its natural stone care guidelines. In other words, do not automatically carry the bottle of vinegar from one surface to the next.
Wash the Sink With Dish Soap and a Soft Sponge, Then Clean Around the Drain With a Small Brush
I would start by removing all food scraps from the strainer and drain.
Then apply dish soap to a soft sponge and wash the inside of the sink with circular motions that will not scratch the material.
Use a small nylon brush around the drain. That area matters because an ordinary cloth often passes straight over it.
If you have a stainless-steel sink, rinse away the cleaner and dry the surface with a clean microfiber cloth.
You can remove a large share of water marks without extra chemicals.
How often? I would remove normal dirt every day when the kitchen is in use, and I would do a more detailed kitchen cleaning of the sink based on how often you cook.
In a study of 22 households, NSF found coliform bacteria on 45 percent of the kitchen sinks tested. A small sample does not represent every household, but for me it gives one more good reason to avoid treating the sink as a place that somehow cleans itself just because water runs through it.
Wipe the Refrigerator With Warm Water and Mild Detergent, and Soften Stubborn Dried Food Before You Wipe It Away

Deal with spilled yogurt or sauce in the refrigerator as soon as you notice it.
For light dirt, I use warm water with mild detergent and a clean cloth.
For a more detailed kitchen cleaning, empty enough of the refrigerator first so you can reach the shelves properly.
Keep food at a safe temperature during the job. Wash drawers and shelves that the manufacturer allows you to remove with mild detergent and warm water.
For dried food residue, you can use a mix of two tablespoons of baking soda and one cup of warm water, which Whirlpool lists as an option for the refrigerator interior.
Apply the solution with a cloth, let it soften the residue, then wipe it away. For corners, I use a small soft brush.
I’m leaving you a video showing how to deep clean your refrigerator step by step.
Wash Kitchen Cabinets With Mild Detergent and Work One Section at a Time
The built-up grime I mentioned at the start of the article appears most often on cabinets around the stove.
I would recommend a method that has always worked well for me. Pour warm water into a bowl and add a small amount of dish soap.
Wet a microfiber cloth and wring it out well because the cabinet does not need to be soaked.
You can also add a small amount of vinegar or rubbing alcohol to the water, as Home Tips recommends at the 43-second mark in their video.
If ordinary dish soap does not have enough effect, check the cabinet manufacturer’s instructions before you move on to a degreaser. I would be especially cautious with painted wood.
How I Make a Kitchen Cleaning Schedule I Actually Follow
For years, I made the same mistake at home.
I would leave most of the work for one day, then end up with an oven that needed a serious clean and a refrigerator that needed to be emptied.
By the time I reached the middle of the list, my enthusiasm was already far lower than it had been when I made the plan.
So I split my home kitchen cleaning schedule across the week.
The jobs are clear and short enough that I can finish them without feeling as if I came home after one shift only to start another.
Here is how I do it:
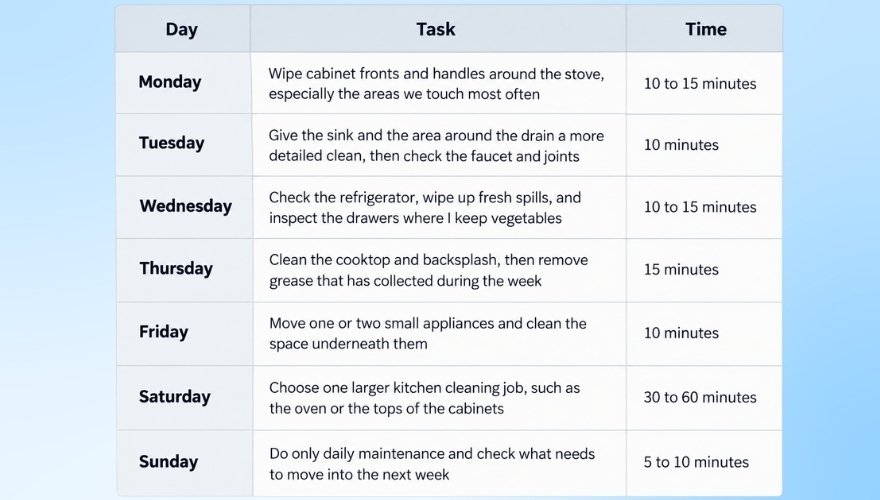
If you want a broader system for the whole house, my weekly cleaning schedule uses the same principle. I spread the work out before several larger jobs end up on the same day.
That kind of system suits me far better than one big cleaning day. After so many years in housekeeping, I already spend enough time looking at task lists at work.
Where Did I Make Mistakes Earlier?
My biggest mistake in my early years was the belief that speed would create more free time for me. The exact opposite turned out to be true. Later, I realized that the right product and enough time often do a much better job, with less risk to the surface.
My second mistake was using too much chemical cleaner. If a small amount of product does the job, twice as much often leaves more residue for you to remove later. The Natural Stone Institute even warns that too much soap or cleaner can leave a film and streaks on stone.
When I have little time, I use a completely different system of priorities. In my article about what housekeepers clean first when they are short on time, I explained how I choose the part of a room that will make the biggest difference to the final result.
A Few More Questions You May Find Useful
Do You Need a Separate Kitchen Degreaser?
If ordinary dish soap removes the grease, I would stick with it. For more stubborn built-up grime, you can use a commercial degreaser made for the specific surface. Read the label before use and test it on a small, less visible area. Stronger does not automatically mean better.
What Should You Do With a Sticky Cabinet Top That Has Not Been Cleaned for Years?
Divide the surface into smaller sections and first try warm water with dish soap. Leave the solution in place briefly according to safe directions for the surface, then wipe it with a microfiber cloth. Repeat the process before you move on to a stronger product.
How Often Should You Do a Deep Kitchen Cleaning?
Once a month, I would at least open up and inspect the less visible areas. A quick check takes very little time and can show you where your next kitchen cleaning session needs to go.
From Daily Spills to Built-Up Grime, You Have Plenty of Time to Make the Job Easier
When I think back to yesterday’s apartment, my problem with the result was not that the kitchen looked terrible.
Quite the opposite. Someone could have walked in and probably said it looked perfectly tidy. I saw the places where kitchen cleaning had not been completed.
The built-up grime next to the stove already required more work than it would have needed a few weeks earlier.
My team had tried to remove it, but the approach was too fast for a layer that had formed much more slowly. And that is probably the lesson I wanted to share when I sat down to write the guide.
At home, you do not have to clean like my housekeeping team. You do not have a supervisor who will come after you with a cloth and inspect the top of a cabinet, and I sincerely hope nobody in your home has that ambition.
Your kitchen cleaning should make your life easier. Remove fresh grease before it builds up. Give built-up grime enough time and use a product suited to the surface.
If you do not know what a material can tolerate, check the instructions before you experiment. After more than 25 years on the job, that is exactly how I would advise someone who reads my blog at home.
And if my team says tomorrow that I arrived at work on a broom again, I can live with that. As long as they clean the kitchen cabinets properly first.